svg cuts banner

Friday, January 24, 2014

Birthday Card for Hubby!

Hi Everyone!

I am taking a few days off from all this cleaning and fixing up our spare bedroom for my Craft room. I have had a hard time choosing a paint color. You know that commercial where she says she want a purple but not a purple??? well that is what I have with my green I want. I want to walk in the room and feel a calm come over me but so far the green on the paint chip and in the test can has been a bit to bright for me to feel calm. So I have worked on a few cards and my dear friends owl till I can decide on the right green for the room.

The card I am sharing today was inspired by one I think I saw on pinterest but who knows really where I saw it lately. I have been so exhausted with all the cleaning that when I did go on the computer at night it was brief and who knows? I cannot give credit to the right person so I am sorry  for that. The Card used her snow falling embossing folder and then she colored the dots different colors to give it the sprinkles look. I took it a bit further and added the "sprinkles" to the shape I used on the front of the card. This makes the card look as though the sprinkles did fall onto the raised cupcake and gives the card another texture as well as dimension.

Since my hubby's B Day is on the 30th and this is close to a big deal for him I wanted something fun and special. I used a cupcake from a Hero Arts Clear stamp set I have called Cupcakes and the number on is it CL158. I colored that in with my Copic markers then I fussy cut it out. I don't fussy cut if I don't have to as my tendonitis frowns upon it. (well worth the pain it would cause me in my hands cuz it was for hubby) Then I  embossed only part of the cupcake. have a colorless Copic Pen that is supposed to push the color out of certain areas. I used that for some of the "sprinkle" parts of the cupcake that I wanted the color to be true on.
Then I made a homemade Wobble Spring. I would highly recommend using a purchased one as they are sturdier and probably able to withstand playing with more. I don't have a craft store in my town so to drive 100 miles and find out they don't have wobble springs at Micheal's or Joann's was not my idea of fun.Here is how to make your own wobble spring: 1. Cut off about a 2 to 2 1/2 inch length of wire. I used a smaller gauge wire I had. 2. Cut two 1 inch circles  out of a heavy card stock. I have 120lb card stock I use to color on using my Copics. I will list where I purchase it on the bottom of this post. 3. I used clear packing take to adhere the wire to the inside of each circle. Cut about a 2 inch length off the roll and cut the 2 inch piece lengthwise into two pieces. 4. wrap your wire around a pick up tool or something about that diameter around, about 3/4 of an inch is my guess. You want it to look like a mini spring. I wrapped mine around about three times. 5. Tape one end of your spring to the inside of one circle laying the tape over the half coil. I trimmed off the excess tape that went over the edge of the circle with scissors. 6. Do that again on the other side with the other circle. Then I glued the outside of my spring to the back of my cupcake and made sure it was secure before I glued it the the "sprinkle" background.

The background was made using my Sizzix Falling Snow embossing folder and carefully coloring the dots to look like sprinkles. I also turned the embossing folder piece upside down so the accumulated snow was at the top not the bottom. This is how the card was that I saw and I thought: What a clever Idea!!!!! and cost effective too as that gives the folder another use! Love that for sure, the cost effective part.  After the cupcake was on and the card was all put together I added some clear Wink Of Stella glitter Pen to the sprinkles to give it a more festive look.
The banner was made using the Phrase stamp in the set and some Versa Mark ink. Add some white embossing powder. To make the banner fold a bit I scored it on my Martha Stewart Score Board in two places one each side then folded. To get a good V cut take your scissors and cut a line straight down the middle of your intended v. Then cut from the edge of the one end into the center of your straight cut and do the other end the same. This insures you don't have a lopsided "tongue" cut.I adhered the ends of the banner to the edges of the card and there you have it. The inside is a single candle(59 this year so no room for 59 candles) LOL and says Happy Birthday. I will include a photo of that as well.
Now when he opens it the cupcake will spring from side to side. Sort of a I know your turning 59 but you can still be silly and have fun Card. This from a man who can get me laughing so hard I either can't breath or I am crying or both.  So that is it my silly card I hope you liked it. I had wanted to do a valentines card using the same theme just with a heart with arms  but I used the freebie Valentines Lion instead. I cut an extra head and made the head wobble then put  tiny googly eyes on it as well. 
So that is it Y'all thanks so much for stopping by. A small update on the craft room. I have everything organized and ready to be moved into the closet in the "new" craft room. Here is my dilemma. The shelves haven't been built yet. So while I wait for our Handy Man to build the shelves, I'll pick my paint color and we'll get going on painting the room. Since our house is old and the walls are lath and plaster and we do not own a stud finder I need the handyman to tell me where the studs are around the room so I can build my around the room desk. Well I hope I can I never did woodwork before but Hey I'm not letting THAT stop me. LOL  I promise to have pictures when I am all done. Have a super crafty Day Y'all and Happy Craftin!
Blessings Sharalyn
Supplies used:
Hero Arts CL158 Cupcake Stamp Set
Simon Says Stamp 120 lb Card Stock
Stampin Up Tempting Turquoise Card Stock (card base)
Stampin Up Red Riding hood Card Stock (banner)
Sizzix Falling Snow Embossing Folder
Copic Markers
Stampendous White Emboss Powder
Wink Of Stella Clear Glitter Pen
Homemade Wobble spring
Versa Mark
Memento Tuxedo Black Ink( stamping my design for Copic coloring)

Wednesday, January 8, 2014

Snow Much Fun!

Hey Y'all!

GOOOOODDD MORIN' Grab your coffee and set a spell this is going to be a long one! LOL
I 'll be popping in once in a while  with projects while I organize and fix up my new craft room. Wooo hooo!!!!!
I will need to paint, build my desk and organize my sewing,quilting and paper crafting hobby! Woo HOO again... so excited! I have gotten some done quite a bit actually and I have already
   benefited from the new organization. While making the caboose I needed some decorative brads. I walked over to my shelf and read the labels I put on all of the containers. I  grabbed the one I wanted right away! I put labels on both sides just so I could make sure I could read it if I put it on the shelf with the opposite way.  I sat and put all the decorative brads in one, all the regular brads in another, buttons by season have their own box and all the eyelets in its own box. All the clear stamps are in clear CD envelopes with labels in a box used for keeping your fridge organized.  When I get this all organized and pretty I will show you how I did all this but watch for pictures on my page along the way.
Lets get started....
First, the Kits I used was North Pole Express Kit and Christmas Open House Kit from SVG Cuts.Cut the engine for the train and the rest of the train at the size it imports and put it all together. While I was adding all the embellishments to the train, kept looking at it thinking something was missing. Then it hit me the light on the front needed a hood and the train needed a bell! I used wire from Walmart in the jewelry section as those come in colors and are easy to bend. The tiny bell I have had for years as usual, I am a serious pack rat when it comes to craft stuff. I bent the wire into the shape I wanted.  I took an extra wire and made a jump ring for the bell, then slipped that over the hook and tightened it. I  poked wholes into the top of the train and like a brad I bent the wires in opposite directions on the inside to hold the bell "tower" in place.

 Now for the hood over the front of the "lights" on the engine. When I try to come up with stuff like this I picture in my mind first what that piece looks like that I want to replicate. If I don't know I do a google search online for a picture of what I want to copy. Then typical of myself is to ask God what can I use to make ____? You fill in the blank. LOL  I looked through my sequins and found one that was shaped like a shell,  then I trimmed off some of the back of it to make it shorter. To shape it, I heated it a bit with my heat gun and had a pencil ready for when I took it away from the heat letting the sequin shape over the smooth pencil. Then I carefully hot glued it to the front of the engine over my rhinestone. The snow look or ice look on the train is Tim Holtz Rock Candy glitter. I used a brown ink pad for the edges of my accent pieces through out making this train. I poked tiny holes in the smoke stack and added the sprays you would use for a wedding arrangement. Now I could have colored it grey with a copic maker but I didn't think of that till just now. The brads were from my stash and the buttons are from Buttons Galore.

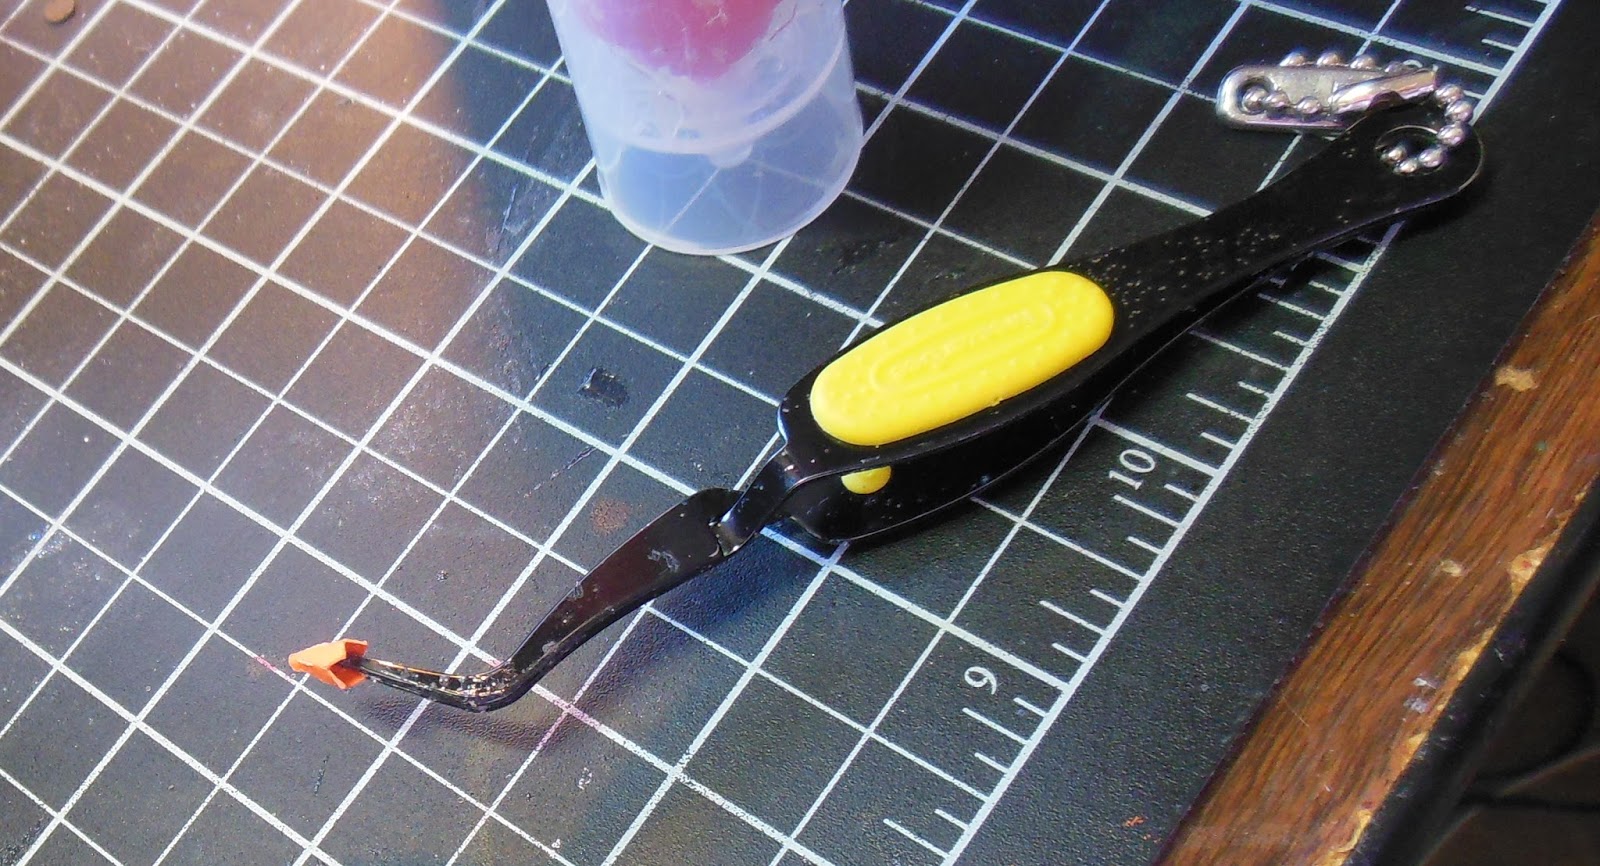
The coal car was made pretty much like Mary made it but I added the snowman from the Christmas open House kit. I sized the body down to W.5.418 x H 4.76. If you bring in all the pieces to your mat a once and then size it down and check the body size that will give you the size of these little guys. Yes they do open up just like the big version Mary made. To hold the small pieces while they dry I use my Tweezer Bee tweezers. They are awesome and up till three days ago I only had the black ones you see in this photo. I'm always saying I need about two more pairs and so I got some more three days ago. So handy to hold those small things our older fingers say What???? NO Way! The ribbon that is flowing behind him is done using a thin wire glued to the back of the ribbon with Tim Holtz Glossy Accents. I know there is this stuff you can use to make the fabric stiff but I wanted to be able to bend it the way I wanted and I don't have any fabric stiff. The eyes and mouth are made using tiny buttons from my favorite button online store. The stop sign is a wooden skewer cut down to size and colored with a permanent marker, then stuck into when of those tiny wooden spools you can get at Joann's. The stop sign shape is from the shapes menu in SCAL and stop written on with a white gel pen.
The Caboose was made the same as Mary says to only I added the Tim Holtz Rock candy glitter to the windows and the top where ever I thought the snow might be still on the train and the little light on the back was from my stash as well. I used ferny greens made very small for the back of the caboose. I used three of the small sprigs and  cut them down a bit to be shorter. I can't tell you what size I cut them as it is from a box I keep stuff like that in for just such an occasion. I have a fall box of cut things like that too and dig through it first when I need something like that. Guess I will have to figure out a way to organize that too. Maybe a file envelope eh?


Well there you have it my North Pole express with a bit of my humor added in. Although you can't see it there is a button on the back of the engine that says snowman crossing. If I forgot something just let me know and I will add it to this post or tell you myself what I did. OK now Run don't walk to the potty as I am sure you have to go by now as you were drinking coffee when we started. Thanks so much for stopping by. Blessing to all of you in this New Year! As Always Happy Crafting! Blessings Sharalyn

SVG Kits used:
North Pole Express SVG Kit
Christmas Open House SVG Kit
 3D Wintergreens SVG Kit

Supplies used:
AC Card Stock: Pomegranate, Latte, Coffee
My Minds Eye , All is Bright
Stampin up (old) Designer paper for wheels
Decorative Brads from Stash
Tim Holtz Rock Candy Glitter
Scotch Quick Dry Adhesive
Hot glue Gun
Buttons from Buttons Galore
Card stock Weight Vellum From Stampin up

Wednesday, December 25, 2013

Merry Christmas????

Merry Christmas Everyone!!!!
Today I want to share a different blog post. Today I want to tell you there are no presents under our tree, there are no gifts I bought I made a few small things. Today I am very thankful that I Do feel joy and goodwill.

We have been trying to refi our house since September, and were told we would be able to skip the November and December payments. So we paid all our over due bills Y'all know how that is, in November and I planned for what I hoped was a wonderful Christmas full of gifts for everyone. Well that didn't happen we had to scramble to make our November payment as our previous lender messed up or paper work not once but twice. We signed a total of three times before all of this was said and done. As of yesterday the payoff on our house had posted and we were still getting calls from the previous lender wanting to know why we hadn't made our house payment.. Ah  yeah the right hand doesn't know what the left hand is doing thing..lol.

To top it off our car we purchased earlier in the year had yet another hiccup. That car was supposed to take care of our car problems for a while and yet it has spent more time in the shop than we care to admit. We do have another car, a very old Ranchero that after so many years is showing it wear. It has been in the shop itself for several weeks as the J brake broke and this car has a habit, all be it a familiar one to this year of going into reverse by itself thus we need that brake and oh did I mention something broke in the handle and he had to hold the door closed so we could get it to the shop.

I called my friend from church and she took us together to church last night for our Christmas gift of song to our community. Today we will have dinner with our daughter and her family and they will have to come get us to go but with God all things are possible.

I know all this sounds really crazy and how can I still be happy? One Name Jesus. You see he said in his word that things like this Would happen and yeppers they sure do. Crazy stuff. Marks mom had a huge health scare this year. So how can I be truly joyful? sounds corny but it is true I have HOPE in Jesus. I know that this world is going to be tough for me He said so. So when it does surprise me It really shouldn't. I am caught off guard like the rest of you cuz guess what I am human. I react in a way that I shouldn't but then I do need to express my discouragement because that is also good. That gives my friends and loved ones that chance to  come along side me as the bible says and hold be up or pick me back up. So yes I am so thankful today and truly happy.
In the bible is says that Mary kept all these things in her heart. I often feel like Mary. I ponder and keep these things that I hold so truly dear in my heart. Oh I have my Martha moments too when I am freaking out and making a scene because I am not getting any help or I am fussing because there are no presents for anyone. Then I come to my senses thank God for that as well and I settle down and stop stressing myself out because I have no gifts for everyone, or the house isn't clean and I have company coming, or I had no sleep and I am just plan grouchy.  My gift to you today is cut yourself some slack!!!! We are all going to mess up and have bad days and behave in a manner we don't want. We are all going through or have been through hard financial times. Knowing that should comfort you some, as those who love you know and understand that what you need cannot be bought at a store, no it comes in the form of a gift  of a baby. It is love in the purest form... that we can share with one another. Our love for one another and we can share our love for one another because God shared it with us first.  Blessings to all of you this day and everyday. My love I give to you in the form of hope. I hope in God. Merry Christmas everyone! Blessings Sharalyn

Wednesday, December 18, 2013

Heaven Or Bust!

Hey Y'all!

Merry Christmas Early!
Let me share with you the story of my special  present for my Pastor. I will tell you how this came about. I was showing my girl friends at church the owl I made for my mom and pastor Tom was standing there and said that the VW bus I made for Pastor Daniel was REALLY cool. Yep that is when I heard it.. that quiet I really would like to have one voice. I know he didn't ever intend to come across that way because that is the way he is but I heard it. I started planning right then and there. I pulled my pastors wife aside on Sunday and asked her what Pastor Tom likes to do besides share God with everyone. The answer? Camping they love to camp.

I started with the lantern from Camp Smore SVG Kit,  as I knew I would have to make it small and that it would cause some good pain in my hands and arms. I wanted to give myself a few days to recover if it was really bad. Well I ended up making two one even smaller than the first. I have Tweezer Bee reverse tweezers that help with making this a lot. If you try this, take your time glue a portion then set it down and glue something else for the lamp, most important don't rush it! Ice was very much my friend last night. Today I finished the lantern by adding perfect pearls in red to make it look like tiny brads.

On to the Camper Bus from Surf Shack SVG Kit, I started with the German Bus.  I cut the bottom at the size it imports. I did the same for the top but made a small rectangle square and put it in the center of the top cover.  To make the side pieces I duplicated the rectangle and used it to size the side pieces and added flaps and score lines for to make the box part of it. I added smaller rectangles to the side pieces fore windows then added vellum to cover them. I took the center piece of the bus top and shrunk it way down.. hey I was really cooking on that shrinking part, lol. I glued the top piece onto the pop-up after I had scored the edges  a bit. I cut extra hooks from the top of the tiny lantern to make the holders for the metal side pieces for the bus and the "luggage rack".  The wire I used to make the rack and the metal part on the pop up came from Walmart in the jewelry making  section. I bent the wires first then slipped the loops on them and carefully glued them into place. When I got this crazy idea to make this I looked on the internet for a picture of a VW Camper. That is when I saw some with luggage racks and some with the parking lights on the front. I liked them so I added them. I used my Epiphany Crafts tools 14 and 25 round resigns  to make the headlights and the wheel and peace sign covers.
I used my Silhouette Sketch pens to add the words to the side panels. I added enamel dots to the bumper to give the attached rivet look. The Windshield wipers are the handles from the tiny lantern. I cut thin black strips of paper for the rubber part of the wipers and glued them into the top folds of the handles. I went outside and got a stick from the yard for the fishing pole and tied Stampin up linen thread to the stick. I had formed a hook using another kind of wire I had. The "bed roll" is just some fleece I had that I tied with the linen thread and then tied it to the luggage rack.
That is how I made this camping VW Bus for my Pastor and I can hardly wait to give it to him. I reeealllly hope he likes it. Thanks so much for stopping by and visiting with me. I hope you all have a wonderful Christmas and Happy Crafting! Blessings Sharalyn

Kits Used:
Surf Shack SVG Kit

Camp Smore SVG Kit


Supplies:
AC Card Stock: Jade, Black, Carmel
Bazzill: Turquoise Mist
Stampin Up:Vellum Cardstock, Linen Thread
Epiphany Tools: 14 and 25 Resins
Hero Arts Metal Adhesive Brads
Gold colored Rhinestones
Enamel Dots
Silhouette Sketch Pens
Wire
Scotch Quick Dry Glue


Saturday, December 7, 2013

Christmas iS in the Air!

Helloooo Y'all!

 Christmas is definitely   in the air! Today we are supposed to get snow and I am hoping we do! Some that will stick as we haven't had any like that in 7 yrs.  Our tree has the lights on but I haven't gotten any farther with it. I need to finish 7 cards today so I need to make this as short as possible.
I had started the church quite a while ago but didn't like the colors I had made the tower so I tore if off and threw it away and there it sat for a while.
The church is from the Silent Night SVG kit  from SVG cuts. I did add a brad and slide to the back flaps to keep the back closed. That helped me a lot. Anyway  I used Carta Bella's paper collection called So THIS is Christmas. I had never used Carta Bella's paper  before and it is JUST like Mary said. High Quality for sure!!!!! I will be using it again in the future! I made the church as instructed and added embossed Snowflakes to the window Vellum before I put them in. Then I decorated the church using Memory Box and Poppy Stamp dies. I will include the dies list at the bottom of this post. The bell was from my friends Stash she had and it was perfect for the church. I added fake snow with hot glue and gemstones to add some glitz. The top I used Stampin Up's heat and stick then used my favorite glitter, Art Glitter Crystal. It is a translucent glitter and really really really pretty on anything you put it on.
So that is my church sorry this is so short but I do hope once I get more of my projects done that I am getting paid for I can post more soon. Thanks for stopping by and visiting me.. I am sorry I have been MIA. Blessing to you all this holiday season!!!

On a side note I had commented on a Scrapbooking Made Simple post and guess what? I won.. scared the snot out of hubby as I screamed but today it came and I couldn't be more excited to use it. I won a Sizzix Stephine Barnard Fancy Flip-its Die. It looks a bit intimidating but I know I can get it. Maybe it will help with my own not started yet Christmas cards LOL . Thanks again. Blessing to you all this holiday season!  Blessings Sharalyn

Kits used:
Silent Night SVG Kit


Paper used:
AC, Vanilla, Lagoon
Carta Bella so This is Christmas
Stampin up Cherry cobbler, Garden Green
Hero Arts Layering Paper, Egg Shell

Dies used:
Memory Box, Precious Snowflakes
Poppy Stamps, Garden Sprig, Small Garden Sprig, Breezy Wreath, Small Blooming Poinsettia, Berry Sprig.

Thursday, November 21, 2013

More Fun with Christmas Cards!


 Mornin' Y'all!


It is cloudy with a chance of rain today so I am happily crafting in my room today. I love days like that! Nothing to do really outside and to cold so your listening to Christmas music and crafting away.. Ok Admit it you all do that after Christmas as well don't you... listen to Christmas music and still work on Christmas crafts...

I am still doing the Online Christmas Card Class and Yet again I have learned new techniques and tricks. I think that is what I love most about these classes. The amazing photos others post in the Gallery for the class is pretty awesome too. I will make this short and sweet today as I need to get busy on a b day card for my dad. Here are a few more of the cards I have done. I am really happy with them.
 Especially the Chalk board card as I have never done one before and half the stuff I saw them use I didn't have... LOL what else is new??? right? Anyway I used a white pigment ink called frost White by Color-box and some makeup applicators from the dollar tree.


I made a circle mask with some left over card stock and  smushed my ink pad into it then used the applicator to make trees and stars. The cute owls are an old Hero Arts Christmas set that I have had a while and the branch is a memory box pine branch. The key to this class is use what you have be inventive and HAVE FUN!!!! Any questions you have on how I did something just ask I would be happy to share, But seriously consider taking some of these classes as they are really great! You can go back years later and go watch the videos all over again and remember all over again what you learned. So Here are my cards and I hope you like them! Thanks so much for dropping by and visiting!
Happy Crafting Y'all! Blessings Sharalyn


Last two cards are masculine and feminine Christmas cards I really never thought of that before but I was happy with the results..
 

Monday, October 28, 2013

Imagination takes Flight!

Morning Y'all!
Well my parents have left for home and I have been working on my secret project almost the whole time they were here. I've been so excited to share it with you and MOST of all to show you that you should NEVER, NEVER, NEVER!!!!!! limit yourself to what a kit is! So I will start with what I used as kits. I used:

Christmas Open House Svg Kit, 3d Wintergreens,3d Mums and Fall Flowers. Bet you can't guess what I used to make some of the things in this new project... Yep most of it was pine cone "leaves" or what ever they are called. 

The body is actually the snowman container but instead of having an open lid I altered the top to close just like the bottom of the snowman. To make the top of the head round I added the accent pieces over the top of the head. Each Feather is made by using the shape of the pine cone pieces and making skinny triangles and placing them in various places around the edge of the pine cone. I also cut the strip at the bottom off using my Silhouette program.  I used Designer addition of Silhouette which I got from SVG cuts at an awesome deal to design or alter the main shapes from SVG cuts. You place the triangles around the shape then select the whole shapes and subtract. I then went in really close and adjusted the nodes to make it smooth . I have done this with the whole project. That is the reason it has taken me so long to make it. I made two sizes of the small body feathers then inked them with Close to Cocoa a retired ink color. I used my flower shaping tools I love so much to shape the feathers.
The beak was another SVG I designed myself. I just started thinking about how I waned it to look and did a lot of research looking at  pictures to see the shape. I will list my paper colors at the bottom of this "book" with all the supplies I used as always. I shaped it as well and hot glued it on to the face. Ok now here is where if you didn't have this SVG kit I think you could use another that might have the same kind of file. I used the Tick Seed Centers from 3d fall flowers SVG Kit to make the eye feathers around the eyes. I curled them up a bit and inked them with pumpkin Stampin up ink. I had already decided that I was going to use my 14 round Epiphany Craft tool for the eyes, just wasn't sure what color I wanted the eyes. I used my 3/8 in circle punch to make the black pupil then I used the Epiphany tool to make the rest of the eye. I used American Craft Card stock on the whole thing but for the eye I used the color Storm. I love me my American Craft Card stock!
I designed the SVG for the feet as well and all I can tell you is start with rectangles and some tall triangles then weld those together and play like crazy with the nodes! I did try to add the little flaps that Mary does on her projects to make it more rounded but when I put in on the log( recycled toilet paper roll) they flattened out. The design needs more work for sure. The front of the owl and the feet are made using Latte American Craft card stock. I used a very retired color ink for the feet It is called Creamy Carmel. The Lines on the feet were brushed on using Stampin up Soft Suede Marker. The toe nails I used a black Copic Marker to give them their color but I did want to use Inkssentials black glossy accents.. I don't have any so that is what I did instead.

I confess I ruined three sponge daubers and will have to purchase some more as I use them a lot when sponging on my ink. For the branch Mr. Owl is sitting on I used a recycled toilet paper roll cut in half and glued the other half inside for stability. The Branch is covered in Chestnut and my forest branches embossing folder was used before hand. I also inked it with three different colors ink. Close to Cocoa, Papertrey inks, Vintage Cream, and Hero Arts Shadow Ink Mid-tone Cup of Joe. I just blotted it with a regular sponge till I achieved the look I wanted.
Ok you ready for the long feathers???? I used the Boxwood from the 3d Wintergreens to make the long feather. I know Whhaaaattt??? ok just consider me weird and get it over with!  I cut one of the round boxwood shapes off the stick and went to work. Now I did do the same thing as the small feathers making a small triangle and arranging them around the shape, then subtracting them and thought ok I am ready to try and cut this tomorrow. Well I woke up the next day and while laying in bed I was thinking about the wing shape. Nope there was something bugging me and that is when I got bring the points in a bit and round it. So I got up early (even beat my dad up LOL) and worked on the shape till I got it right. I did enlarge the shape and elongated it and here is the kicker I used the Shear window to help get the look I was going for. I shaped those and hot glued them on using my detail hot glue gun I bought on amazon.The same Close to Cocoa ink was used on the longer feathers.

I used a pine Cone from one of our trees in the back yard on a small branch and added one of Mary's Pine cones as well then made the short pine needle branch and cut it in half and hot glued those in place. So there you have it my long involved project that I made and well Mom is getting this one.
She had said over and over that she loved my rooster and I just couldn't think about doing that again it was so hard on my hands and arms. I was also ready to try to do something like that again and learn as I went, which I did. I am hurting today and will need to take about a week off of doing long involved projects before I can start another one. I already have an order for one and I sure didn't expect that! It is for someone I love very much so it will be a labor of love that I get the extra  blessing of getting paid for it.
Ok Y'all I am sure you have had a couple of cups of coffee by now and now need a trip to the restroom. Sorry this was so long but I did do a lot and when I don't explain it all some really get upset with me. Thank you so much for reading this whole thing and for visiting me again. It blesses my heart to know your reading this and when you leave your comments I am blessed again. Here is the heart of this project: Mary and Leo work very hard to bring you amazing kits but that isn't the only thing you can do with them. They are a jumping off place for your creativity. To me you give Mary the highest compliment when you take her design and go with it. I have learned so much from the design of Mary's files and it has taught me how to design for myself. Don't look at the whole picture or you wont even start. Think of them as simple shapes and go from there.Thanks again for settin with me Y'all and  Happy Crafting! Blessings Sharalyn

SVG Kits used:
Christmas Open House SVG Kit
3D Wintergreens SVG Kit

3D Mums and Fall Flowers SVG Kit
Supplies used:
American Craft Card Stock: Storm, Black, Tangerine, Clay, Latte, Evergreen
Stampin Up Ink: Close to Cocoa, Pumpkin, Soft Suede Pen
Papertrey Ink: Vintage Cream
Hero Arts Shadow Ink Midtone, Cup of Joe
Epiphany Crafts 14 round tool
Copic Marker Black
Recycled Toilet paper roll
Scotch Quick Dry Adhesive
Detailed Hot glue Gun. (has a very small tip)