Good Eeeevvving!
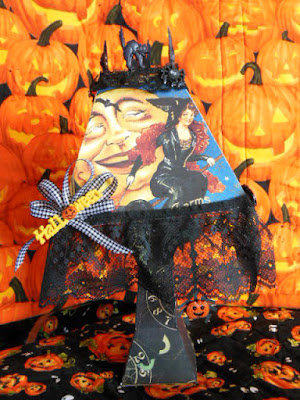
 Sorry couldn't resist. The new kit that came out this past week is really fun and even has a swell clock you can make. The Kit is called Maison de Madeline. I have had lots of fun playing with it and today I made a Halloween version. I used the Halloween paper from Graphic 45. It is last years paper which I have to say I love it! Very vintage and I love that about it. The colors the feel of it gives you the days when Halloween was all in good.
I used the eyes from Elmhurst Hallow kit and re sized them to fit. I cut a 13/8 hole in the bottom of the lamp to allow for a tea light to fit over it then I cut a 1/2 in circle in the bottom of the lamp shade to turn a tea light upside down and but the light through it to light up the top portion of the lamp. Then placed another tea light on top to light the small holes and cut outs I did by hand to allow for light to shine through carefully chosen areas of the paper. The holes were covered on the inside by small pieces of vellum.
I loved the spider pull someone had put on their lamp so I used the spider from Gothic Flourishes to make the pull then added a vintage type pumpkin button to the top of the spider to make it look like a pumpkin spider. Add the black lace and hot glue the flat Halloween Cats to the top and the Halloween flat to the top of my ribbon and I am done. I did enlarge the lamp some to accommodate the tea lights at the bottom.
After reading Leo's article today about lighting and your point and shoot cameras I asked some questions about how to achieve the right lighting for a spooky soft look. Leo was VERY helpful and after many shots I found two I was happy with. Honestly I kept playing with the settings to see which one I would like. Play with your camera and get to know it but turn off your flash and learn more about light and how it works. If you want to know more about lighting read the article about lighting and your point and shoot camera Leo wrote. You can read that on their blog on svgcuts.com. Happy Crafting everyone and be sure and check out the new kit from last week. Below is a link that should take you right to their site. Sit a while and have a look around, you'll be hooked before you know it.Thanks again for settin' a spell with me.
 Blessings, Sharalyn
Kits and Collections Used:
Maison de Madeline SVG Kit
Elhurst Hollow SVG Kit
Gothic Flourishes SVG Collection
No comments:
Post a Comment