svg cuts banner

Monday, June 30, 2014

Smore' Summer


Morning Y'all!!!!!

I was anxiously waiting for the new Parkside Row SVG Kit to be released from SVG cuts and well, honestly they took to long for me and my mind wandered. I started thinking about Big Bear and taking a vacation and my mind when there. My hubs says what is this for? My reply? They took to long for the new kit to be released and my mind wandered. Ya know I can't be idle that long. He laughed and said it was cute. Thank God my husband understands my need to create.

Start with the Lantern from Stars and Stripes SVG Kit and cut it at the size it imports, then before you glue the sides all on use the panels for the top and release compound path then take out the stars and cut that out of vellum. I used a pigment ink pad to color my vellum an orange color as if it were from the firelight. The frames that go on the inside I cut out of Tangerine AC Cardstock. That was to further give the look of the "glow" from a fire. I have a large box of overhead write on sheets I use to cut the windows from. Seriously I am going to be shocked when I run out I have so much. I cut two inside bottom pieces for the lantern one out of Coffee AC cardstock then one out of the Smore's paper from Imaginisce. I bought the paper
last year as I knew the consolation paper would come in handy and the Smores  paper was just so cute! I glued the vellum to the inside top of the lantern then glued it together with the exception of the window area. I used double sided 1/8 tape to glue the sides of the lamp together. This is also How I put the plastic on the window area as well.

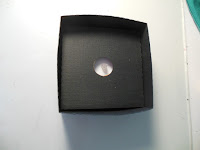
On the the fire pit so to speak. I used the bottom of the inside lamp piece to "measure" the size of the firebox I made. Bring all the pieces onto your mat and size it using that inside accent piece of the lamp to make sure it will fit, also think about the size of your tea light..  I cut the top but first added a .50 sized circle to the top of the box, the accent and the cut out fire circle that goes on top. This was to allow the bulb from the battery opp tea light to fit through. Since the ones I have flicker I thought this would be a realistic touch. Then I used more of the orange vellum to cut the flames. I bent the bottom of the flames up and glued them onto the cut out fire piece. Then glued those onto the top. Now for the top and bottom. Cut one top and one bottom sides, no bottom piece. I did not glue the bottom onto the fire box. Instead I glued the top of the box together first then turned the flaps on the bottom over and glued the flaps to the inside of the lid. Try to use a patterned card-stock as I found that has a bit more give with fitting over the tea light. I had to squeeze it in and put glue dots on the top to get it to stay. If I had made the lantern larger I could have used the box I think and simply made the box big enough for the tea light. I had already gotten the lantern made and I wasn't going to make another. LOL After I put the tea light in I used some double sided tape to hold the two fire vellum's in place I used Gathered Twigs ink pad on the Vanilla card-stock for the marshmallow for the toasted look.

The Trees and the bears are from Country Forest SVG Collection. I used a chevron emboss folder for the trees and black glossy accents for the eyes and nose of the bears. To get the right size for the bears I used the trees as my guide. The camp smore pennant  was sized way down and then I used tweezers to put the pieces in place. ( No I cannot hold anything that small without dropping it) The Buttons were from our local fabric store and I am sure you could find them anywhere, but just in case you can't there is always Button's Galore and more online. That is all I did to make this but I do love how cute it turned out. Thank so much for stopping by, stay cool ya'll it is HOT here! Blessings on you all and Happy Craftin' my friends! Blessings Sharalyn

SVG Kits and Collections Used:
Stars and Stripes SVG Kit
Camp Firefly SVG Kit
Camp Smore SVG Kit
Forest Country SVG Collection

Supplies Used:
Imaginisce, Outdoor Adventure, S'mores, Wild & Free
American Craft Cardstock: Coffee, Chocolate, Chestnut, Tangerine, Evergreen, Caramel, Vanilla
Ranger: Black Glossy Accents
 Stampin up: Linen Thread, Card-stock Weight Vellum
3M Write on Transparencies
Score Tape 1/8 inch.


Saturday, June 21, 2014

An Idea Brought to Life!

Good Evening,
New Blog Post Y'all!  An Idea Brought to Life! http://sharaspapercreations-sharalyn.blogspot.com/2014/06/an-idea-brought-to-life.html: That was way to formal for me! HI Y'all!!!!, After straightening up my room last night I started drawing out some ideas I had from window shopping online. I really needed to get those bulky papers out of my new sketch pad I was thrilled to find. I love summer and early fall as that is when all the cool patio stuff comes out.  I have been asking to fix ours up for a while now but he has his ideas of what is cool and I have mine. I want comfort and pretty, he wants durability so of course nothing has happened out there yet. Anyhoo, as I was drawing out some of the ideas onto my pad I started drawing this one and my mind flooded with which kits and collections I could use from SVGcuts.com. I got most of it designed last night and then this morning at 4am I was wide awake with pretty Graphic 45 paper dancing in my head. Oh darn, I am not going to get back to sleep. I couldn't wait to get started.

The roof from Maple Manor was the first thing I thought of and oh yes I could use the Tall Gift box for the body and so on. I will try to make a legible list of the sizes you'll need to cut and whatnot at the bottom of this post. I put the tall gift box onto my virtual mat, then brought in the roof from the center tower of Maple Manor. I didn't want to mess to much with the size of the roof, as I did want this to be a pretty good size. I matched the score lines on the tall gift box with the score lines on the roof to size it correctly. Then I drew two rectangles one for the outside of the window and that would be the door size as well. Then the four little ones for the windows. If you use another program you might have a shapes menu you can get your rectangles from.  I use Designer addition of Silhouette to design in as it is super easy for me. It was not at first but I have had my machine about two years now and love it!
 Once I you've centered the rectangles, group and make a duplicate. Move your duplicate off the mat so if you screw up you have a copy of what you made in the first place. (experienced in screwing up)  Un-group and use the outer rectangle to make the doorway for the door later. Now subtract the 4 small rectangles from the tall box and voila you have your windows. Now that you have done that on all three sides and decided in the process which panel on the box you wanted for your door, use the set aside rectangle from the windows and subtract that from  your panel to make your doorway.  You will need to make it slightly smaller and I will put the measurements at the bottom of this post.  I put the small holes for the brads on the folded side of the box so I wouldn't have to mess with glued layers. Subtract those and then of course you made a copy of the circle right? Use that, to make the holes for on your door.
The door was the copy of the window frame and two small rounded rectangles welded to the frame to make the hinge. Since I know you made copies of your circles or wrote down your size you will use those to make the holes for the brads. Lay the door frame over the front of the cut out for the door so you can center the holes in the correct place before you subtract them from the door.
The rest is pretty easy now you will be cutting the shapes at the sizes I list. (if your at all interested in making this) When I woke up so early this am the beautiful paper from Graphic 45 Couture was dancing in my head. I knew I just had to use it but also knew it would be much stronger if I used a plain card stock as the base. I will list the size of the rectangle I made for the panels it is the same window frame but with the outer edge much larger.
I love the clasps that a lot of the new lanterns are closing with but haven't found anything like it yet I can use with paper.  I wanted something special and checked one of the files I used to make this for ideas. I saw the leaf and knew that was it. I glued three leaves together and then ran it through my big shot with the Cuttlebug paisley emboss folder. It still isn't very strong so I decided that it would be for looks mostly and I would not glue the lid(roof) in place so that the light could be put in and turned off that way. I used the spindle ornament from Christmas Ornaments SVG Kit as the top and glued the top to roof. I had two portions of the top that did not glue and that may have helped me smush it a bit to the top. The bottom is the face 1 piece from the Crate in Carmel Apple Pie SVG Kit and the feet are from dresser in Call Me Later SVG Kit. The "gingerbread" piece on the front is label 1 in from Memory Garden SVG collection. I cut it down to about a 1/4 of the height with my knife tool. Cut 8 and glue two together then cut 8 Curly Swirly from Design Elements SVG Collection. Glue two each of those together and run through the paisley emboss folder. Glue the"gingerbread" unto the front and then center onto the crate front under your panels. The feet from the dresser were glued onto the crate face bottom, then once they were dry I glued it to the bottom of the tall box. I used the insert for the inside of the box to finish the look inside the lantern.  The panels for the roof were also embossed with the paisley folder. In the center of each curly swirly, I adhered a black rhinestone. There are three at the top on the knot of the twine as well.  That is lantern. I hope you like it and want to try your hand at making one. I would like to try one using the Botanical Garden paper as well from Graphic 45. I think you would get a whole different look. Thanks for stopping by, I hope this wasn't to long for y'all to read. Have a wonderful evening and Happy Craftin Y'all! Blessings Sharalyn

SVG Kits and Collections Used:
Gift Boxes SVG Kit
Maple Manor SVG Kit
Caramel Apple Pie SVG Kit
Christmas Ornaments SVG Kit
Design Elements SVG Collection
Memory Garden Designer Page SVG Kit

Supplies used:
Graphic 45 Card Stock: Couture Collection
American Craft Card Stock: Black
Hero Arts: Black Brads
Stampin up: Card Stock Vellum
Creative Charms: Black Rhinestones
Scotch Quick Dry Adhesive

Sizes for cuts:
Tall Gift Box: W. 7.970 H 8.615
Bottom of tall box: W 7.915 H 3.654
Vellum: W 3.013 H 5.850
Center Tower Roof Maple Manor: W 9.988 H 10.745
Window Frame W 3.013 H 5.586
Inside Rectangles: W 2.429 H 5.254
Small Circles: 0.097
Crate Face 1: W 9.145 H 5.274
Dresser Feet: At the size they import
Spindle Ornament: W 6.139 H 5.229
Leaf: W. 1.116 H. 0.596
Curly Swirly: W 2.540 H 0.468
Label 1 cut down: W 3.685 H 0.797 
 Panel Frame: W 3.554 H 6.901

Tuesday, June 17, 2014

A Little Boys Smile

Good Morinin'
Some of you know I have been working on my own designs, but I had wanted to do something that I didn't have to do much thinking. Kind of mindless ya know? Sometimes I just need something I only have to think about papers and maybe a few embellishments. I had posted that kind of a note on the SVG cuts page and one person responded. They wanted to see my take on the fish tank. I will be honest, I had no intention of making that fish tank. It looked like a ton of work and I just wasn't into it that much, but when I saw it my grandson Wyatt was here. He is 4 and his eyes bugged out and he smiled that smile at me that said, grandma I know you can make this and I would love this.. oh gosh! Darn that smile and those eyes !
I love all my grandsons and I have 6. I get to see four of them more than the other two because they live in the next town over just a short 7 miles at the most from me. The other two are all the way toward Oklahoma. Anyhoo when those little blue eyes smiled at me oh, I was a goner as they say.

1st problem: I encountered making this was that I couldn't find the file. I had received a new to me laptop from my dad about Oct. last year and thought I had retrieved all the files I needed off of it. (it came on only when it wanted to) I finally found it buried in a file on my desktop. I had already sent an email to Leo to re-enable the download.
2nd problem: the way the instructions were listed the Height was listed first then the width and Silhouette lists the width first then the Height. So I was not paying close attention and messed up the cut for the "glass" part. I had started using a new blade holder I ordered from China as I was wanting something that lasted longer. I had done research on this and found this blade holder and blades. They are awesome and cut like butter but that is another post. I didn't want to cut the acetate with my new blade and dull the brand new one that was cutting like butter right out of the box so I was switching back and forth between the silhouette blade and the new blades. So this was not fun for me to realize I had made the H &W mistake. All of this should have been my clue to quit while I was behind, but I persevered. (or I am really thick and I just didn't know when to quit, that is probably the real answer) 3 problem: I was very concerned about how much heat a battery pack that held 4 or 6 batteries would conduct,a 4 and never quit touching 7 year old and this is paper. I had looked at the instructions and decided I would change the bottom so it would hold a battery operated tea light on the bottom and top.
So this is how I started.
When I finally realized my mistake I re-cut the "glass and top and bottom. I did make another top and bottom making it about a 1/4 inch smaller all around and a hole in the center for the light to fit into. I will show a picture of one of my mess up ones so you can get the idea of what I did. Then to make the insert fit at a lower level I cut the edges half way off with scissors. I drew a box around the inside cut lines of the "lid" and centered a circle the same size to cut out of chipboard. (cereal box)This was to give my insert strength when I  glued the rocks on the top using my Glossy accents. I  totally forgot so they aren't glued down. I will do that in Riley and Connors. The insert on the bottom is taped into the inside bottom of the "glass" AFTER you put the fish inside.


Then on to the fish, which wasn't so bad now that I knew to pay close attention to my H and W sizes. I had a lot of fun making the fish and of course adding a turtle. I didn't want Wyatt to be scared of the scary fish so I took him out. He will go in the other tank I will make and so wont go to waste. I didn't use the fish from the Sea Side kit either as the one thing I found is don't try to over stuff your fish tank. Also I didn't like the visual I was getting for the long coral so I made it a bit less squished looking. I found my bag of sequins I purchased from Walmart a long time ago and dug through and found white and clear iridescent sequins, a couple of green and silver as well. I put those on the coral and seaweed after I inked the seaweed with pigment ink and a sponge. I daubed them with the ink like real coral looks.  I used my tiny bubbles emboss folder and a darcy woodgrain folder to add texture to the fish, coral and seaweed. That was the fun part then getting the acetate inserts to stick to the sides of the tank was a challenge for me and getting them in and straight was not so fun. Although it looks super cool, and IS a fantastic project it is not one I excel in.That IS me not you and I am not at all saying you shouldn't try this if you just love it. It is awesome wow factor!
The top is make just like the bottom, I kept the tea lights in place by putting the 3d glue dots onto the top if them. This way the lights can be reached to change the batteries and turn off the lights when not needed. Next time I will make a holder for the bottom and add the cardboard to the top as well or make several thicknesses with cardstock to recess the light a bit more. All in all a very cute project. I bought the color changing lights from Amazon in a 12pk. I didn't know they blinked until I tried one. It said it was what I had ordered before but I know the other ones I bought did not blink. I am not sure I like them that way but we'll see.

I am thinking of one for the older two boys with a sunken ship of some kind. Riley loves pirates and Connor will say he is too cool for the whole thing but grandma knows he will love it as well. Defiantly has to have a shark, that will make it so much cooler.. well, I hope it be cool.  Thanks for reading my blog and leaving me some love. Y'all have a great day and Happy Craftin'! Blessings Sharalyn

SVG Kits and Collections Used:
Box Cards SVG Kit
Gift Boxes SVG Kit
Surf Shack SVG Kit
 Wet N Wild SVG Kit
Tropical Friends SVG Collection

Supplies Used:
American Craft Card Stock: Black, Crimson, Keylime, Aqua, Mint, Moss, Sunflower, Lipstick, Blossom, Mustard, Carrot, Plum, Marine, Lavender
, Lemon, Cherry, white, Dandelion, Leaf and Stone: All Scrapbooksteals.com
Bazzill Card Stock: Turquoise Mist : Scrapbook.com
Ranger Glossy Accents: Michaels
Ranger Black and White Glossy Accents: SimonSaysStamp.com (eyes)
3M  Write on Transparencies. Staples
Sequins: Walmart
Decorative Rocks: Dollar Tree
Zots 3d Glue dots: Michael's
Clear glue Squares: Dollar Tree (attach acetate to sides of tank)
Scotch Quick Dry Adhesive: Michael's
Cuttlebug Emboss Folder: Tiny Bubbles
Darcy Emboss Folder: Wood Grain
Color Changing Tea Lights Amazon.com Lily's HomeTM Color Changing Everlasting Tealights Candles with 7 Rainbow Colors- Set of 12


Tuesday, June 10, 2014

God Cares about his Princesses

Evening Y'all!

We have had quite the heat wave here in the High Desert lately. I am up late as I wanted to clean up my mess  I made today. Yesterday we got our Sunday call from my MIL and she asked to speak to me, that is not something she normal does but I as I listened she wanted a card for her housekeepers little girl. She said she was going to be 6 on the 6th of July and this housekeeper had done so much for her she wanted to have a special card. I can't tell you how many times I have told her I could make her a card, all she had to do was ask. I knew right away which one I should make. The lovely castle from the Box Card SVG Kit Mary had made. She told me the little girl loved purple so I dug in my stash and found the Secret Garden Collection. I knew it had a lovely purple and the pattern perfect for this castle card.

As I cut out the card I thought what is a castle without a coach? I know a lot of 6 yr old little girls that just love castles and coaches and sparkly stuff. So I set my mind to try to get one made today so Mark could take it and the card with him tomorrow when he took his mom to the Dr. 
The Coach would be a surprise for his mom so she would have something to give the little girl, complete with a color changing light because big and little kids like those. At 94 and not ever having learned to drive she seldom gets out to get a gift.


I said a prayer and asked the Lord to help me get it all done today for her and that I would have the supplies and not a surprise when I got half way done with it. (surprise meaning not enough supplies, I have done that before!)
I cut everything at the size it imports and used lots of pearls and Rhinestones and my Clear Wink of Stella Pen.  I think I need a new one it is almost gone LOL. I had exactly 5 sheets of white card stock left and that is just what it all took for the wheels and base. I am amazed I didn't mess something up finding out I only had 5 sheets left and trying hard to get this and the card done today for her. If you haven't cut the coach from Enchanted Autumn, it is both lovely and well designed but it requires a lot of cutting.

I used my Tim Holtz inks and a blending tool to make the sky and the clouds for the card. I am not very good at it yet, I think that is something you need to practice. I will list the colors I used at the bottom of this post. I inked the edges of the white leaves on the coach with the purple (seedless preserves) and added Hero Arts bling to the centers of the leaves. The brads were something I had in my stash I bought a long time ago.  I did hot glue the wheels to the base, as I wanted it to be sturdy. I know it won't last but at least she will have it for a little while to enjoy. I used the argyle emboss folder for the handle on the coach . That was to match the argyle in the card as well that I used on just the edges of the door and the center tower.
I had a small mishap with the top and didn't realize I had put the cut out piece on the wrong edge so I pulled off the one next to it and re- cut that piece and the one next to it. I knew i couldn't remove my boo boo but I used the matching pattern instead to bring your eye back up. This would make you notice that the piece was all in matching colors. The SG logo almost cut in the perfect place and gave the feel that someones crest was on the door. That is the look I was going for anyway.

I made quite the mess in my room and it took me a while to clean it up but I do try after each project to clean it up. To me that shows respect to my husband and my God for giving me such a wonderful place to craft and such lovely things to craft with. My arms were shaking as I wrote this I guess I pushed just a bit hard, but I know in my heart God wanted this for this little one. I do not know why but I am blessed to be able to create if for her and my MIL. Thank you Mary kowal for creating such wonderful files, and thank you so very much for visiting with me. Have a very blessed day and Happy Craftin'. Blessings, Sharalyn

SVG Kits Used:
Box Cards
Enchanted Autumn

Supplies Used:

Graphic 45 Card Stock:  Secret Garden Collection
American Craft Card Stock: Lavender, White
Tim Holtz Distress Inks: Seedless Preserves, Spiced  Marmalade, Picked Raspberry, Salty Ocean
Hero Arts Gems: Prism Gems, Lavender Gems, Royal Purple Gems
Creative Charms: Purple Pearls, Amber Gems
Wink Of Stella Pen: Clear
Stampin up: Card Stock Weight Vellum
Cuttlebug Argyle emboss folder
Scotch Quick Dry Adhesive
Hot Glue

Wednesday, June 4, 2014

New Trick

Mornin' Y'all,
It is 5:30 a.m. and I have been lying awake for about an hour already. Sometimes my mind just pops on in the wee hours of the morning and I can't shut it back off. Grab your cup of coffee, (Brown Sugar Cake this a.m, a gift from my daughter) and set with me a spell. I have a small story to tell you....

This amazing and wonderful thing has been happening with me and I know God is behind it all! I have been creating my own designs start to finish, all from scratch, as a friend put it. I am so excited to be learning a new way of creating and I have learned a bit of how to make a PDF. Ok, confession here, I didn't even know what PDF stood for. It stands for Portable Data File, tomorrow I may forget that but today I know.

 The first design I made you have already seen. It was the lantern one with stars and the other plain but large enough for you to put things in according to season. Another is not completed yet. I know when I can't quite get something right, it is because God has something else I need to learn first. Something I will used in my design that will help it come together perfectly. I have a couple of things I have done with that.  Some using SVG cuts and my new  lantern with feet that has an oriental feel to it.
This is how this latest project came about.
 I was putting together the trailer from Camp Firefly and this memory kept creeping back into my mind. At least I thought it was a memory, I wasn't sure I didn't dream it at one time. When in doubt ask mom, did we ever go camping in a tear drop trailer? The answer, yes we did. One time.  Dad and mom had never done that before and so had not ever backed a trailer into a driveway. She rented it came home with it and pulled into the driveway.  My dad had never backed a trailer either, in fact my mom had to have a trailer hitch welded to the back of our station wagon for us to rent it. Not ever having backed a trailer in before they couldn't do it so they never rented one again.
 Anyhoo, I only had the one memory of standing at a camping spot (mom says by a lake) cocking my head sideways and thinking, that looks AWFUL small! (says a 4 yr old catastrophic mind)  We had been told all three of us were going to sleep in that. My older brother myself and my twin brother! There was tiny window on the door and as far as my four year old mind could see, that was to small for me to sleep in! Well I remember mom opened the back and there was a shelf for cooking on, we crawled inside and to my great relief it wasn't so small inside for three little kids. (twin 4 year olds and a 6 yr old) I asked my mom if that was the fishing trip I caught my first fish (seriously tiny fish) she said no. Much to my chagrin they made me eat that fish! but that is another story. That is how this trailer came about and my special Father's Day Gift to my Dad.
I started with a memory and since my memory is not all that great I found a photo of a tear drop sleeper trailer like we had rented. Then I made the oval shape and started playing with the nodes. Those are the points that make the cut or that is my explanation anyhoo. I am sure Leo can explain it a lot better.  I have put together enough of Mary's wonderful projects over the years to sort of know what I needed to do from there. I saw a picture of one with the back open like my mom said it did and you cooked on the back. No stove but I think they must have used their Coleman cook stove like we have. The back on mine does go down the hinges slide inside and you can close the back. The side door opens and you can set the battery operated tea light inside about middle so it doesn't tip. I had cut the wheels and went off the paper a bit with my one wheel. That gave me the idea to cut off the very ends so it would stand. Crazy huh? Looking at the photo again I saw that it had fenders and that one came a little easier thanks to making enough of Mary's designs.
I am not sure at all what I will be doing with all these designs but I am happy as I said to be adding wrinkles to my brain at almost 54. Hmmm you can teach an old dog.. who'd have thunk it? Mom said the one they rented was silver and at first I wasn't going to make one that color but I may change my mind as it might mean more to my dad. Every little girl no matter how old she is should have such a wonderful dad. I am truly Blessed. Happy Crafting Y'all! Blessings Sharalyn

Kit Used:
Trailer designed by Sharalyn Morgan

Supplies Used:
American Craft Card stock: Aqua, Sea Foam Green, Latte, Chocolate, Black, White, Concrete
Echo Park Card Stock EveryDay Eclectic Kraft/ Wood
Tim Holtz Candy Stripe Emboss Folder
Recollections Tiny Brads
Scotch Quick Dry Adhesive