Start with the snowman and cut and adhere it together using the sizes that will be listed at the bottom of this page. Leave the accent pieces off so you can glue the ears underneath the top accent pieces. You can decide what accent pieces you want to glue them under when you decide how you want them to look. Up, down, folded.. etc..
Make another hat without the brim to glue inside your tulip basket. I made mine to match my bunny but you could make yours to match the inside of your tulip or make it a color of the center of a tulip. I left the handle of the tulip basket off as I liked that better, of course it is your choice your the designer. The hat for the top of the Bunny was cut to appear like the center of the upside-down flower on her head. You will notice I made my shorter in this photo but I found later that was not necessary.
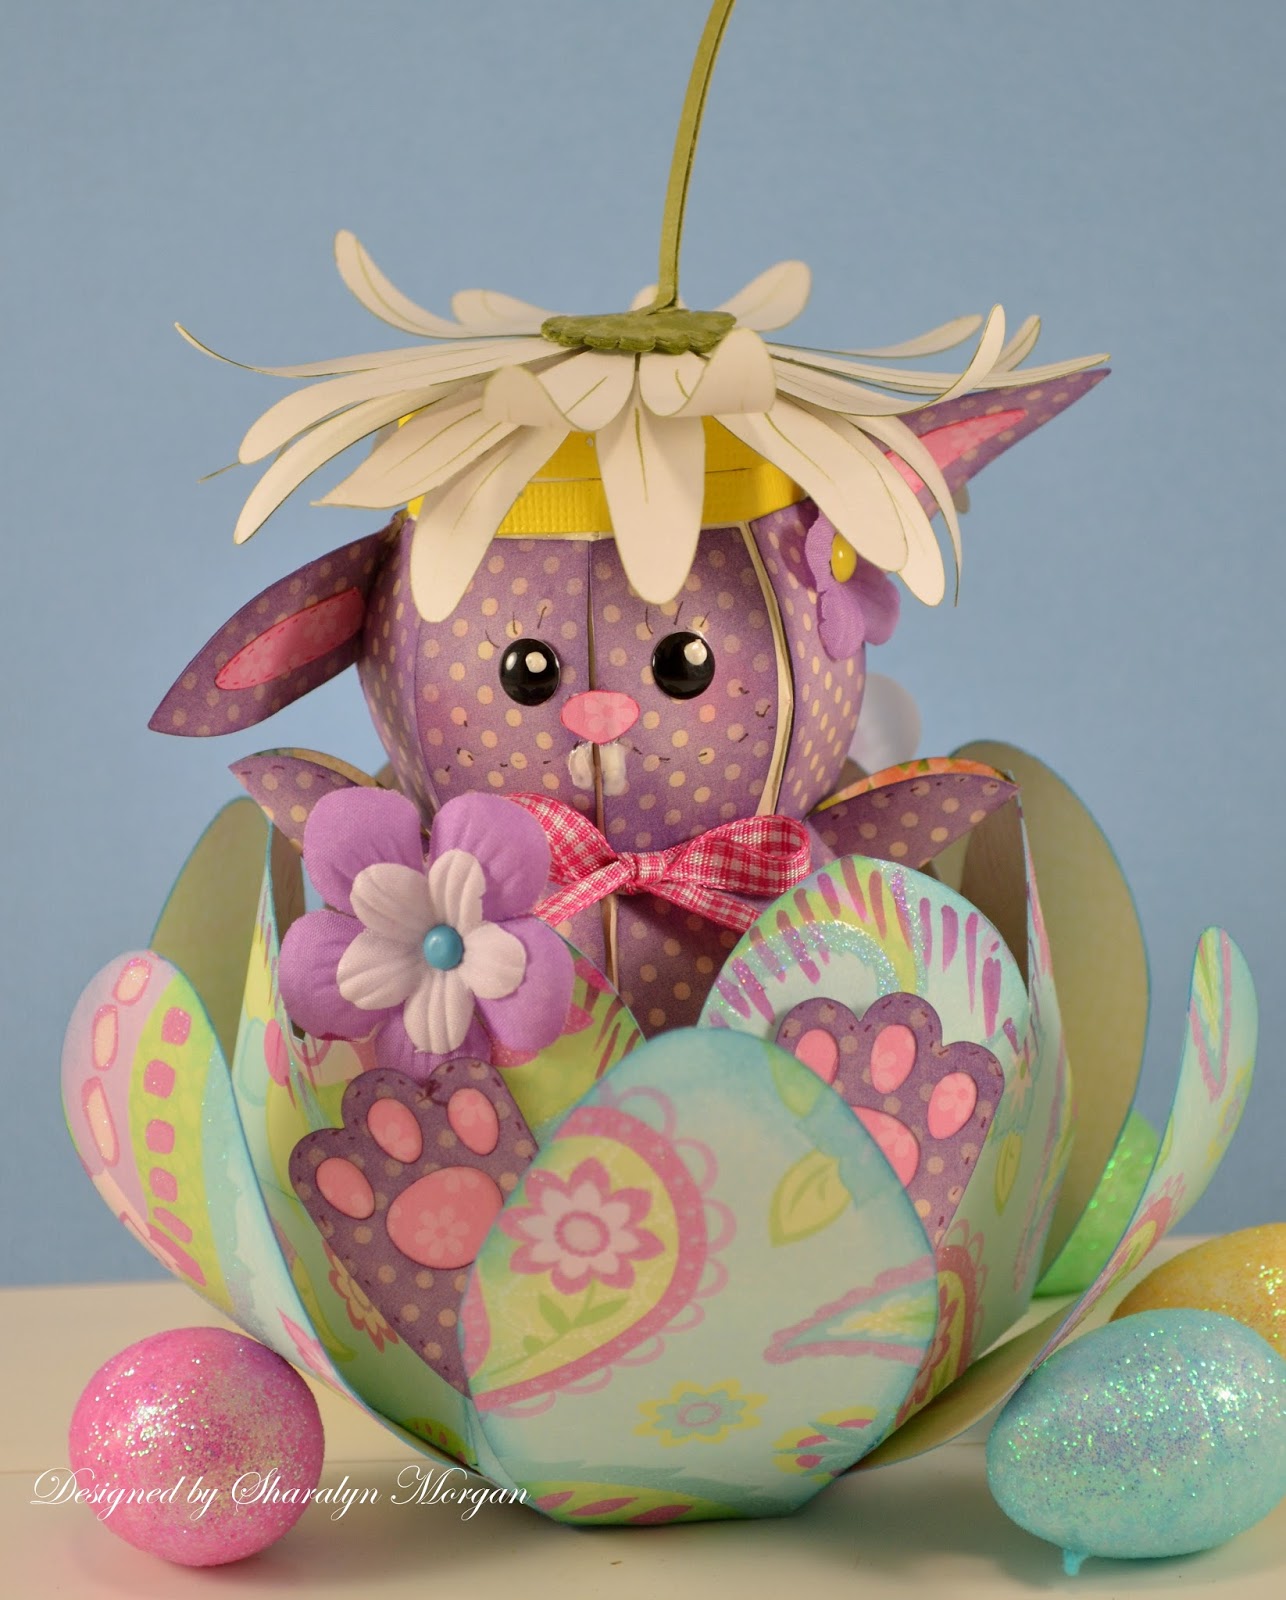
I was thinking about daisies when I made this so I cut the flower white and the center Yellow. Exact colors I used will be listed below. I used the Gerber daisy and cut 6 petals from white card stock. Using Stamping up's Lucky Limeade Marker I used the brush side and lightly added stripes to the flower petals. Use the same marker and edge the flowers with green. Make the "hat" for the bunny out of yellow and glue the flower onto the top of the "hat". I used the large scalloped center from the Cedi's Mum and glued 5 centers together punch a hole in the last one and adding two thin Curly-Q glued together from Pick a Pumpkin SVG Kit, trim to your desired length.
Decide which side you want your bunny face on and glue the accents in place sliding and gluing your ears under the top accents. I added dash lines to the edges of the insides of the ears before I glued them into place. I used black enamel dots to make the eye and Ranger white accents to make the white portion of the eye. I also used the white accents to make the teeth. Draw your mouth into place first then add your teeth and nose. I wanted my bunny to be rejoicing in spring so I glued her paws in an upright position. The feet were glued to the inside layer of the tulip box. I glued a bow at the neck and a flower just under her ear on the right side. I used a yellow enamel dot for the center of that.
To cover the holes for the tulip box handle I used silk flowers I had in my stash and brads. I had decided after I had cut it with holes that I didn't like the handle on so that was my "fix" for it. Thinking about some tulips I have seen that have stripes I added the stripes with a Rich Razzleberry Stamping Up Marker. The Bunny's accent pieces were inked in that same color. I also inked the edges of the Tulip box with a blue Copic Marker. When I glued the rest of the petals for the tulip on the outside of the box I glued them to the first score line then curved them with a dowel.
That is all I did to make this sweet little bunny and she is my Easter gift to you all, thank you so much for stopping by and Reading my blog. I hope you enjoy this little sweetie and if you make one I would love to see it. Thanks again, have a wonderful day and Happy Craftin' Y'all!
Blessings, Sharalyn
SVG Kits Used:
Christmas Open House SVG Kit
Bunny Hop SVG Kit
Egg Hunt SVG Kit
3D Flowers SVG Kit ll
3d Mums and Fall Flowers SVG Kit
Pick A Pumpkin SVG Kit
Supplies Used:
American Crafts Card Stock: Lemon, Oregano
Bazzill Card Stock: White, Cream
K& Company: Sparkly Sweet
Graphic 45: Sweet Sentiments
Doodle Bug: Hello Sunshine
Ranger: White Accents
Stamping up: Rich Razzleberry Ink
Stamping Up, Stampin write pens: Lucky Limeade, Rich Razzleberry, Early Esspresso
Copic Markers: RV66, B02
Black Enamel Dots
Yellow Enamel Dots
Silk Flowers, Ribbon, brads from Stash
Ranger: Mulit Medium Matte
Scotch Quick Dry Adhesive
Silhouette Designer Addition
Silhouette Cameo
Cut Sizes:
snowman_body: W 8.986 x 7.872 H
snowman_ hat_minus brim: W 10.285 x 1.952 H cut 2
snowman_accents_top: W 4.289 x 3.330 H
snowman_accents_ bottom W. 4.913 x 4.889 H
Bunny_ pink : W 3.515 x 1.739 H
Bunny_ white_feet: W 2.285 x 1.978 H
Bunny_white_ears: W 3.306 x 2.175 H
Bunny_white_paws W 2.316 x 1.351 H
Gerber daisy: W 4.292 x 4.165 H
Cedis Mum center: W 0.909 x 0.917 H
Curly Q: W11.00 x 0.085H
This is absolutely adorable, I love it!
ReplyDeleteThank you Judi
DeleteWow!! So cute!!! I love it!! Love the cute flower on its head! Thanks so much for sharing and for sharing the detailed instructions! :) ~Mary
ReplyDeleteThank you Mary:)
DeleteThat is just sooo cute! All the colors work so well together, and I really enjoyed how you took several different kits and combined them into this amazing project!
ReplyDeleteMike
DezinesbyEM
Dezinesbyem.blogspot.com
Thank you Mike, this is something I really love doing.:)
DeleteYour creations are simply stunning. I should have left my comment ages ago. There isn't one crayon you have made that I haven't been stunned by. Your creativity is amazing!
ReplyDeletewell thank you, my creations come from my creator. I am the lucky hands that get to make them. thanks so much, Sharalyn
ReplyDeletewow so cute
ReplyDelete